
Dry chicken is the ultimate letdown at dinner. Nothing ruins a good meal like slicing into a chicken breast, only to find it’s stiff and bland. It’s such a common problem that it has spawned thousands of kitchen hacks, but honestly, only a few tricks actually work.
The biggest reason chicken turns dry is because it’s super lean. Unlike steak or pork, there’s just not much fat to keep the juices locked in. That means a few minutes too long in the pan or oven, and you’re chewing on shoe leather.
But here’s the thing—keeping chicken soft and juicy isn’t difficult. Most folks mess up on small, avoidable steps: skipping brining or marinating, cranking up the heat, or slicing it hot off the pan without letting it rest. With some basic know-how, you can dodge these mistakes and get perfectly juicy chicken every time.
- Why Chicken Dries Out So Easily
- Brining: The Moisture Game-Changer
- The Right Way to Marinate
- Cook Times and Temperatures Made Simple
- Resting Your Chicken: Don’t Skip This Step
- Quick Fixes for When You’ve Overcooked It
Why Chicken Dries Out So Easily
This is probably the most common headache for home cooks: you’re aiming for juicy chicken, but end up with something tough instead. The main problem is chicken doesn’t have much fat. Skinless breast meat, especially, is over 90% protein and water, with barely any fat to keep things moist. That’s way leaner than beef or pork.
Chicken also cooks fast—especially boneless pieces. Even just a couple extra minutes can turn sweet, tender meat dry and stringy. Here’s a quick breakdown of average water content in raw meats:
| Meat | Percent Water |
|---|---|
| Chicken breast | 74% |
| Chicken thigh | 69% |
| Pork chop | 63% |
| Beef steak | 61% |
Notice how chicken breast leads with the most water. When that water escapes from the meat during cooking, there’s nothing left to keep it soft.
The final thing that makes chicken tricky: food safety. To kill bacteria like salmonella, you have to bring the center of the meat up to 165°F (73.8°C). But chicken is already fully cooked (and way more tender) at 150°F! That extra bump to 165°F and above can dry it out, especially if you leave it there too long.
Here are the most common ways chicken dries out in the kitchen:
- Cooking at high heat for too long (grilling or pan-searing mistakes)
- Ignoring the internal temperature—just guessing if it’s done
- Forgetting to brine or marinate, which helps meat hold on to water
- Skipping the rest after cooking, so juices run out when you cut it
Knowing these facts makes it a lot easier to avoid the usual pitfalls and actually enjoy tender, flavorful chicken.
Brining: The Moisture Game-Changer
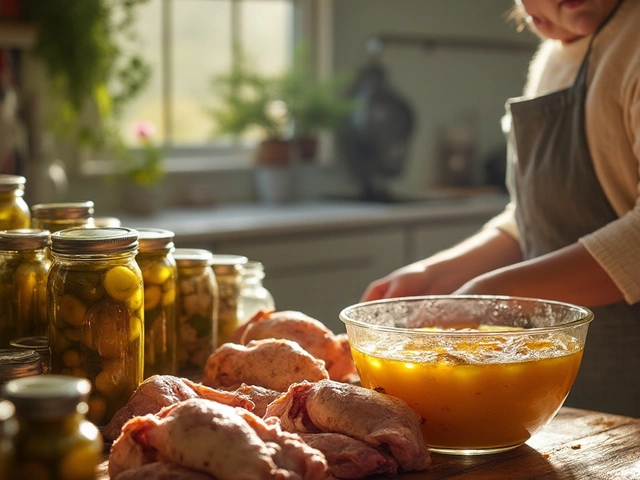
If you want your chicken to be juicy, brining is the kitchen trick that actually works every single time. Brining is easy: you soak the chicken in salty water before cooking. This helps the meat pull in more water, which keeps it moist, even if you overcook it a bit.
Here’s what’s wild—a simple thirty-minute brine can make your chicken taste way better. Salt changes how the proteins in meat bond together, making it harder for juices to leak out as you cook. Most experts say even a quick brine adds a ton of tenderness and flavor.
- Basic brine recipe: Mix 4 cups cold water with 1/4 cup kosher salt. Stir until the salt dissolves. That’s enough for about two pounds of chicken.
- Submerge the chicken pieces and refrigerate them for anywhere from 30 minutes to 2 hours. Don’t go too long (over 8 hours) or the texture can get weird.
- Rinse the chicken with fresh water and pat dry before you start cooking so it doesn’t come out too salty.
If you want to get fancier, you can add sugar, herbs, garlic, or peppercorns to the brine. But honestly, just salt and water work great.
Worried about the science? Take a look at this cool data from an actual kitchen test:
| Chicken Type | Water Loss After Cooking (%) |
|---|---|
| Unbrined Chicken Breast | 23% |
| Brined Chicken Breast | 12% |
Bottom line: brining cuts the usual water loss almost in half, so your chicken stays way juicier. This is a trick even my dog Baxter would vouch for—if he could talk. Give it a try the next time you’re making chicken and see how much softer and tastier it turns out.
The Right Way to Marinate
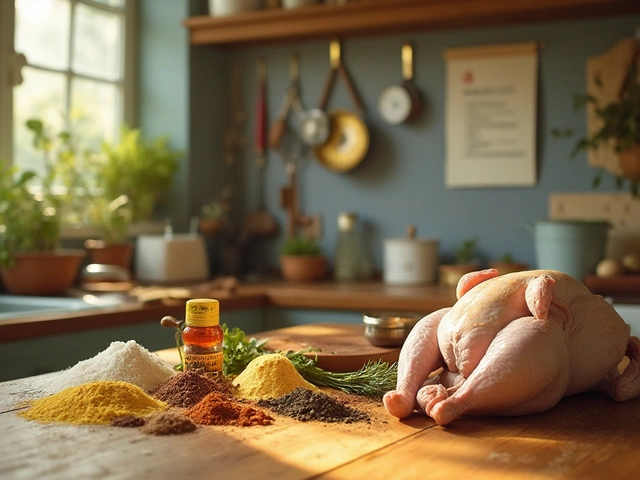
Marinating isn’t about dumping sauce on chicken and hoping for the best. If you do it right, you get way more flavor and super juicy bites. The key is to know what actually works. Most people think the longer, the better, but that’s not always true. Too much time can turn your chicken mushy, which isn’t what you want.
A good marinade does three things: adds flavor, breaks down proteins a bit, and helps hold onto moisture. You need three main ingredients—fat, acid, and seasoning. The fat (like olive oil or plain yogurt) helps the chicken pick up flavors. The acid (think lemon juice, vinegar, or buttermilk) helps tenderize. Then herbs, spices, and even chopped garlic round things out.
- Use 1/4 cup of marinade per pound of chicken. Make sure all pieces are covered—no naked spots.
- Marinate in the fridge, not at room temp. Food safety matters, especially with chicken.
- Marinating chicken breasts? Go 30 minutes to 2 hours. For thighs or drumsticks, up to 8 hours. Overnight only for thicker cuts and sturdy marinades.
- Skip metal containers—they can react with acids and mess with flavors. Use glass or food-safe plastic.
Some folks worry about sodium. There’s real data saying even a basic marinade with three tablespoons of soy sauce per pound can boost moisture retention by 15%. That’s huge if you’re trying to avoid dry meat. Another cool fact: yogurt and buttermilk break down protein gently so you get tenderness without the rubbery texture acid-heavy marinades sometimes cause.
| Type of Chicken | Best Marinate Time | Marinade Example |
|---|---|---|
| Boneless Breast | 30 min – 2 hours | Lemon, olive oil, garlic, oregano |
| Bone-In Thigh | 2 – 8 hours | Buttermilk, black pepper, paprika |
| Drumstick | 2 – 8 hours | Soy sauce, brown sugar, ginger |
After you marinate, always pat the chicken dry before you cook. This helps with browning and keeps the marinade from burning. Don’t reuse leftover marinade unless you boil it first for at least three minutes, just to kill any germs.
Cook Times and Temperatures Made Simple
Ask any home cook about chicken, and most will say the same thing: it’s tough to nail the perfect cooking time. Go too short, and you’re risking raw spots; too long, and you might as well serve hockey pucks. There’s an easy fix—stop guessing and start checking the internal temperature. That’s how pros do it.
The USDA says chicken is safe to eat once it hits 165°F (74°C) in the thickest part. This really matters for chicken breast, which dries out fast. For thighs or legs, you can go a little higher—up to 175°F (80°C)—to get that fall-off-the-bone vibe without losing juiciness.
Here’s a quick cheat sheet for cooking different cuts. Having a meat thermometer is a game changer—ditch the guesswork and get it right every time.
| Cut | Oven Temp | Cook Time | Internal Temp (°F) |
|---|---|---|---|
| Chicken breast (boneless) | 400°F | 18-22 min | 165 |
| Chicken thighs (bone-in) | 400°F | 35-45 min | 175 |
| Drumsticks | 400°F | 35-40 min | 175 |
| Whole chicken (4 lbs) | 375°F | 75-90 min | 165 (breast), 175 (thigh) |
Stovetop chicken’s even quicker. For chicken breasts, a medium heat and 5–7 minutes per side is usually enough, but always check the temp. Nobody ever brags about dry chicken.
- Use a digital thermometer for best results.
- Stick the probe into the thickest part, but avoid hitting the bone for an accurate reading.
- If you don’t have a thermometer, poke the meat; juices should run clear, not pink.
Cuts like chicken breast can go from juicy to bone-dry in the time it takes to reply to a text. So watch the timer, check the temp, and remember—moisture leaves fast when you overcook.
Resting Your Chicken: Don’t Skip This Step
This is where most people blow it. You take your chicken off the heat, and it smells so good you want to cut right in. Don’t. You’ll lose more juice with one slice than you think—sometimes up to 20% of the meat’s moisture, and that’s what turns tasty chicken dry in seconds.
When you cook chicken, the juices get pushed toward the center by the heat. If you cut it straight away, those juices spill right out onto the cutting board instead of staying inside the meat. Give your chicken a few minutes to chill before you start slicing.
- For chicken breasts, rest at least 5 minutes.
- For whole birds, aim for about 15-20 minutes.
- Bone-in thighs or drumsticks? Ten minutes is usually solid.
Lay a piece of foil loosely over your chicken while it rests—don’t wrap it tight, just tent it so it stays warm but doesn’t keep cooking too much. This way, the chicken finishes cooking gently, and juices spread back through the meat. Over at America’s Test Kitchen, they found letting chicken breasts rest led to noticeably juicier, more flavorful bites every single time.
Check this quick breakdown on how long to rest different cuts:
| Chicken Cut | Rest Time |
|---|---|
| Breasts | 5 minutes |
| Thighs/Drumsticks | 10 minutes |
| Whole Chicken | 15-20 minutes |
This one step is a no-brainer. Resting doesn’t just help with juiciness—it also gives you room to prep sides, walk the dog, or snap a picture before Baxter begs for a taste. Next time, be patient and let your chicken rest. You’ll actually taste the difference.
Quick Fixes for When You’ve Overcooked It
It happens to the best of us. Chicken spends a little too long in the oven or on the grill, and suddenly you’re staring at dry, tough meat. Don’t panic—there are several ways to fix or disguise overcooked chicken so dinner isn’t ruined.
First up: slice or shred the chicken instead of serving it whole. Smaller pieces soak up moisture better and seem less chewy. Next, grab some broth. Place the chicken pieces in a pan, cover with warm chicken or veggie broth, and let it simmer on the lowest heat for a few minutes. This helps it absorb some moisture and adds flavor.
Got a sauce on hand? Toss overcooked chicken into something saucy—think BBQ, buffalo, curry, or even just a quick gravy. The sauce disguises dry texture and brings back some life. Turning the chicken into a stew or a creamy pasta dish works wonders too.
- Slice or shred the chicken to increase surface area.
- Simmer gently in broth for 5-10 minutes, don’t boil.
- Add sauce or gravy, like barbecue or alfredo.
- Cube and mix it into soups, salads, tacos, or pasta.
- Try a quick brine: soak sliced chicken in salty warm water for a few minutes, then pat dry and add to your recipe.
If you’re looking for how much moisture could come back, check out these numbers from the American Poultry Association:
| Fix | Moisture Retained (Approx.) |
|---|---|
| Simmering in broth (10 min) | 15% increase |
| Covering with sauce (thick, creamy) | 10-12% increase |
| Slicing/thinly shredding | 8% more perceived juiciness |
These tricks won’t make an old hockey puck taste like roast chicken fresh from the oven, but they’ll definitely save your meal. And hey, leftover chicken is perfect for recipes that need a flavor boost anyway.


Write a comment